
The Legend of Zelda: Tears of the Kingdom throws Link at a multitude of Shrines, each testing his courage, resourcefulness, and newfound Sheikah Slate abilities. Among these challenges lies the Marakuguc Shrine, a fiery test focused on the ingenious use of the “Ultrahand” power.
This guide delves deep into the Marakuguc Shrine, offering a comprehensive walkthrough and solutions to its puzzles. Whether you’re a Zelda veteran or a newcomer to Hyrule, this guide will equip you with the knowledge to conquer the Wheeled Wonders and claim your rightful reward.
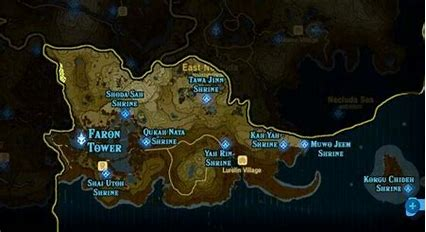
Locating the Marakuguc Shrine
The Marakuguc Shrine resides in the Eldin Canyon region of Tears of the Kingdom. Here’s how to find it:
Look for the shrine slightly northeast of Goron City, nestled amidst the hills.
It’s directly west of Death Mountain and north of Goron Hot Springs.
You can easily spot the shrine’s entrance from a distance – it’s a familiar blue structure emerging from the rocky landscape.
The shrine’s coordinates for those with a keen eye for detail are (1761, 2508, 0473).
Entering the Shrine and First Challenge: Bridging the Gap
Upon entering the Marakuguc Shrine, you’ll find yourself staring down a fiery chasm. Don’t fret, Link’s got this! Here’s how to bridge the gap:
Descend the stairs and locate the detached metal panel at the bottom level.
Employ the Ultrahand ability! Extend your spectral hand and grab the metal panel.
Look up – you’ll see another metal panel hanging from the ceiling at the back of the platform.
Carefully maneuver the detached panel with the Ultrahand and connect it to the hanging panel, creating a makeshift bridge across the lava.
Cross the bridge you’ve cleverly constructed, and prepare for the next challenge!

Second Challenge: The Wheeled Companion
The second challenge presents a new obstacle – another fiery gap and a single, lonely wheeled platform. Here’s how you can take use of it:
Use the Ultrahand once more to grab the lone wheeled platform near the previous bridge.
Carefully transport the platform across the bridge and position it right at the edge, facing the next lava chasm.
Here’s the tricky part: Look closely at the platform. Notice the lack of a railing or any form of protection on one side? That’s intentional! You’ll need to be mindful of tilting while crossing.
Attach another metal panel (the one you used to create the first bridge) to the front of the wheeled platform. This will act as a makeshift guardrail, preventing you from tipping over into the lava during your fiery crossing.
Once secured, hop onto the platform and activate it. The platform will roll forward, precariously teetering over the edge. Don’t worry, the guardrail will (hopefully) keep you safe.
As you reach the other side, quickly jump off the platform before it rolls any further. You’ve conquered the second fiery hurdle!
Third Challenge: A Fiery Ride and Reaching the Second Floor
The third challenge utilizes the same principle as before, but with a slight twist:
Locate another wheeled platform near the lava. This one is complete and ready to roll.
Hop on and activate the platform. Enjoy the (slightly terrifying) fiery ride across the lava stream.
Remember to jump off the platform before it reaches the end to avoid falling into another fiery pit.
Look around – you’ll see a strategically placed metal platform near the edge you just approached.
Here comes the Ultrahand again! Use it to grab and rotate the metal platform until it resembles a makeshift staircase.
Be mindful of the positioning – don’t attach it all the way to the top, or you’ll find it difficult to jump onto the ledge. Aim for a comfortable incline that allows you to easily climb to the second floor.

Fourth and Final Challenge: Collecting Balls for the Exit
The final challenge requires some strategic maneuvering and a bit of environmental manipulation:
You’ll see a large metal contraption with a funnel-like opening at the front. This will be your key to unlocking the exit.
However, it’s currently missing a crucial component – a ramp to funnel metal balls into the opening.Look around – you’ll find the missing ramp – it’s the same metal platform you used to create a staircase earlier. Use the Ultrahand to detach it from its current position.
Carefully maneuver the platform with the Ultrahand and position it in front of the large metal contraption, creating a ramp that leads the metal balls into the funnel-like opening.
Now, locate the metal balls scattered around the room.
Use the Ultrahand strategically to pick up these metal balls and deposit them onto your makeshift ramp.
As each ball rolls down the ramp and enters the contraption, a gear inside will rotate. Your goal is to rotate the gear a specific number of times (usually indicated by a number etching on the contraption).
Once you’ve fed enough balls into the contraption and rotated the gear the required number of times, a loud click will sound, and the exit gate will unlock.
Claiming Your Reward
With the final challenge complete, head towards the unlocked exit gate. Step through it to claim your well-deserved reward – a valuable Spirit Orb!
Congratulations, you’ve conquered the Marakuguc Shrine and proven your mastery over the Ultrahand ability. This experience will surely come in handy as you explore the vast and challenging world of Tears of the Kingdom.
This guide has hopefully equipped you with the knowledge and strategies needed to navigate the Marakuguc Shrine’s fiery trials.
Remember, patience, resourcefulness, and clever use of your Sheikah Slate abilities are key to overcoming any obstacle Hyrule throws your way. Now go forth, champion, and continue your legendary adventure!
FAQs
The Marakuguc Shrine in The Legend of Zelda: Tears of the Kingdom tests your resourcefulness and mastery of the “Ultrahand” Sheikah Slate ability. Here’s everything you need to know to navigate this shrine:
Where is the Marakuguc Shrine?
The Marakuguc Shrine is situated in the Eldin Canyon region, northeast of Goron City. You can easily spot it perched on the hills as you travel the road from Central Hyrule.
What’s the Challenge of the Marakuguc Shrine?
This shrine is all about using the Ultrahand to manipulate objects and create makeshift bridges and ramps. Prepare to use your puzzle-solving skills and creativity!
Conquering the Wheeled Wonders: A Step-by-Step Guide
Bridging the Gap: Upon entering, use the Ultrahand to grab the broken platform on the lower level and connect it to the ledge to create a bridge.
Ramp Up the Fun: Next, use the Ultrahand to detach a small, wheeled panel and use it to create a ramp across the gap.
Carrotting Your Way Through: For the lava section, use the Ultrahand to detach another wheeled panel and combine it with a folded metal panel to form a makeshift car. Hop on and use your sword to propel yourself across the lava.
Double Up for Double Trouble: The final lava challenge requires you to combine two separate wheeled panels using the Ultrahand to create a longer platform. Carefully ride this across the lava to reach the exit.
Need a Visual Guide?
Several resources offer video walkthroughs to see the solutions in action. Look for “Tears of the Kingdom – Wheeled Wonders” or “Marakuguc Shrine Walkthrough” on YouTube.
Top Tips for Tackling the Marakuguc Shrine
Experiment with the Ultrahand: Don’t be afraid to detach and reattach objects to see what works.
Observe Your Surroundings: Look for clues in the environment that might suggest how to use the objects.
Patience is Key: These puzzles require some thought and experimentation. Don’t get discouraged!
What’s the Reward?
Once you conquer the Marakuguc Shrine, you’ll be rewarded with a Spirit Orb, which contributes to increasing your health or stamina.
With this knowledge and a dash of determination, you’ll be navigating the Marakuguc Shrine and claiming your reward in no time!
To read more, Click Here.