
Unsend an email in outlook, We’ve all been there. You hit send on an email, only to realize there’s a typo, a missing attachment, or worse, you sent it to the wrong person entirely. In the age of instant communication, a frantic scramble to undo that email can feel essential.
The good news is, Outlook offers a feature called “Recall Message” that allows you to attempt to retrieve an email you’ve already sent. However, it’s not a magic bullet. There are limitations and factors that affect its success, so let’s dive into everything you need to know about unsending an email in Outlook.
Can You Really Unsend an Email in Outlook?
Technically, Outlook doesn’t truly “unsend” an email. Instead, it uses a recall function to request the recipient’s email program to delete the message. Here’s the catch:
Success Depends on the Recipient: The recipient’s email program needs to support message recall and be configured to allow it.
Timing is Key: The faster you act, the better your chances. The recall function only works on unread messages. Once the recipient opens your email, it’s likely out of your hands.
Account Type Matters: Recall only works with Exchange Server accounts. It won’t work with POP or IMAP accounts like Gmail or Yahoo Mail.
How to Recall an Email in Outlook (Desktop and Web App)
If you meet the criteria above and need to act quickly, here’s how to attempt a recall in both the desktop and web versions of Outlook:
For Outlook Desktop App (For Windows or Mac):
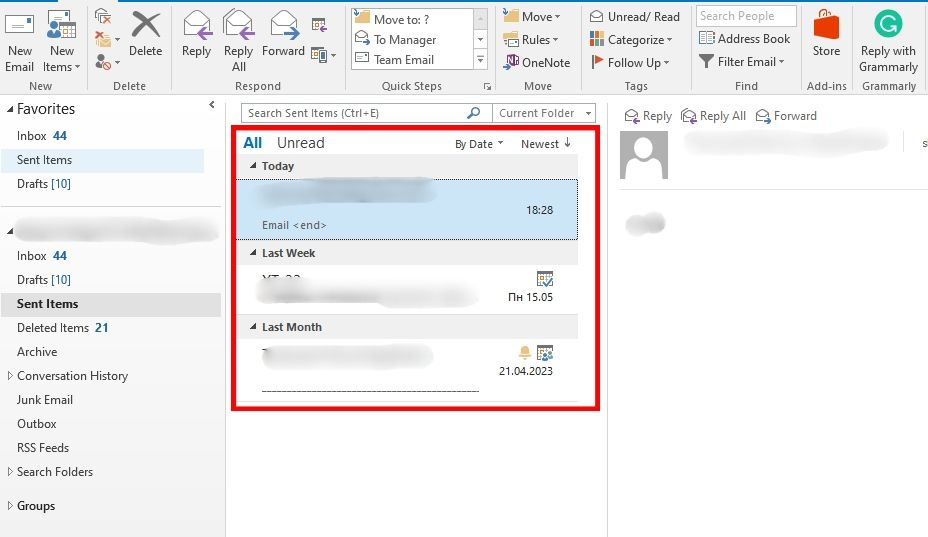
Access Sent Items: Open your Outlook application and navigate to the “Sent Items” folder.
Find the Email: Locate the email you want to recall and double-click to open it in a separate window.
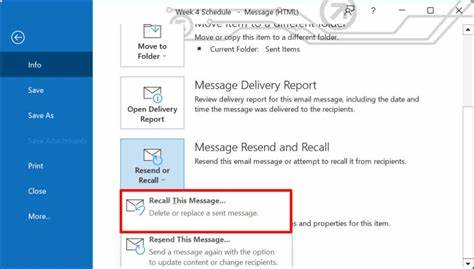
Recall the Message: Locate the “Message” tab on the ribbon at the top. Click on it, and then find the “Actions” button. A dropdown menu will appear. Select “Recall This Message.”
Choose Your Recall Option: A confirmation window will pop up offering two options:
Delete unread copies: This attempts to delete the message from the recipient’s inbox if they haven’t opened it yet.
Delete unread copies and replace with a new message: This allows you to send a new, corrected message in place of the original one.
Confirm and Wait: Select your preferred option and click “OK.” Outlook will attempt to recall the message.
Track the Recall Status: You’ll receive a “Message Recall Report” in your inbox informing you if the recall was successful, pending, or failed.
For Outlook Web App:
Access Sent Items: Log in to your Outlook web app and navigate to the “Sent Items” folder.
Find the Email: Locate the email you want to recall and double-click to open it in the reading pane.
Recall the Message: Click on the three dots (…) in the top right corner of the reading pane. A menu will appear. Select “Recall This Message.”
Choose Your Recall Option: Similar to the desktop version, you’ll see the same two options for recall. Choose your preference and click “OK.”
Track the Recall Status: Just like the desktop app, you’ll receive a “Message Recall Report” in your inbox detailing the outcome.
Important Considerations When Recalling Emails
Don’t Rely Solely on Recall: Consider recall as a last resort. There’s no guarantee it will work, so crafting emails carefully beforehand is always the best practice.
Be Clear in Your Recall Message: If the recall is successful, the recipient will receive a notification. It’s a good idea to include a brief explanation in your recall request to avoid any confusion.
Alternatives When Recall Isn’t an Option
If the recall function isn’t available or unsuccessful, here are some alternative approaches, depending on the situation:
Contact the Recipient Directly: If you have a good relationship with the recipient, you can send a follow-up email explaining your mistake and providing the correct information. Be apologetic and transparent.
Request the Recipient to Delete: If it’s a minor error and the information isn’t sensitive, you can politely ask the recipient to delete the original email.
FAQ’S
Can I Really Unsend an Email in Outlook?
Technically, no. Once an email is sent, you can’t retrieve it from the recipient’s inbox. However, Outlook’s Recall feature allows you to request the recipient to delete the email if they haven’t already read it.
Here’s the Catch: Recall Only Works Under Specific Conditions
Exchange/Microsoft 365 Accounts: Recall only works if you and the recipient both have Exchange or Microsoft 365 accounts within the same organization. It won’t work for external recipients with different email providers like Gmail or Yahoo.
Quick Action Required: The sooner you act, the better. The recall function is most likely to succeed if the recipient hasn’t yet opened the email.
How to Recall an Email in Outlook (Desktop App and Outlook.com):
Locate the Sent Email: Open Outlook and go to your “Sent Items” folder. Double-click the email you want to recall.
Initiate the Recall: Look for the “Message” tab in the ribbon. Click it, and then find the “Actions” button. A dropdown menu will appear. Select “Recall This Message.”
Choose Your Recall Option:
Delete unread copies: This attempts to delete the email from the recipient’s inbox if they haven’t opened it yet.
Delete unread copies and replace with a new message: This option lets you send a new, corrected email to replace the original one.
Confirmation and Follow-up: Click “OK” to confirm the recall request. You’ll receive a “Message Recall Report” in your inbox informing you whether the recall was successful, pending, or failed.
Additional Considerations for Recalling Emails
No Guarantees: Even if you meet the conditions, there’s no guarantee the recipient will approve the recall request or be able to delete the email if they’ve already read it.
Time is of the Essence: Act swiftly! The chances of successful recall significantly decrease the longer you wait after sending the email.
Alternatives When Recall Isn’t an Option
If recall isn’t possible, here are some alternative strategies:
Reach Out Directly: If you know the recipient well, send a quick follow-up email apologizing for any errors and clarifying the correct information.
Request Deletion (if applicable): If it’s a work email within your organization, you could politely ask the recipient to delete the original email if they haven’t opened it yet.
Tips to Prevent Sending Regrets
Proofread Carefully: Double-check for typos, missing attachments, and ensure the email is addressed to the correct recipient before hitting send.
Enable “Delay Delivery” (Desktop App Only): This feature lets you schedule emails to be sent later, giving you a chance to catch any errors before they fly out of your inbox. You can find this option in the “More Options” menu when composing a new email.
To read more, Click here