In the perilous world of Baldur’s Gate 3 (BG3), crafting powerful equipment is essential for overcoming challenging encounters. One such location, the Adamantine Forge, holds the key to forging some of the most potent weapons and armor in the early game.
This guide delves into the secrets of the Adamantine Forge, explaining how to find it, utilize its unique crafting system, and craft legendary gear to empower your adventuring party.
A Legacy of Dwarven Might: Unveiling the Adamantine Forge
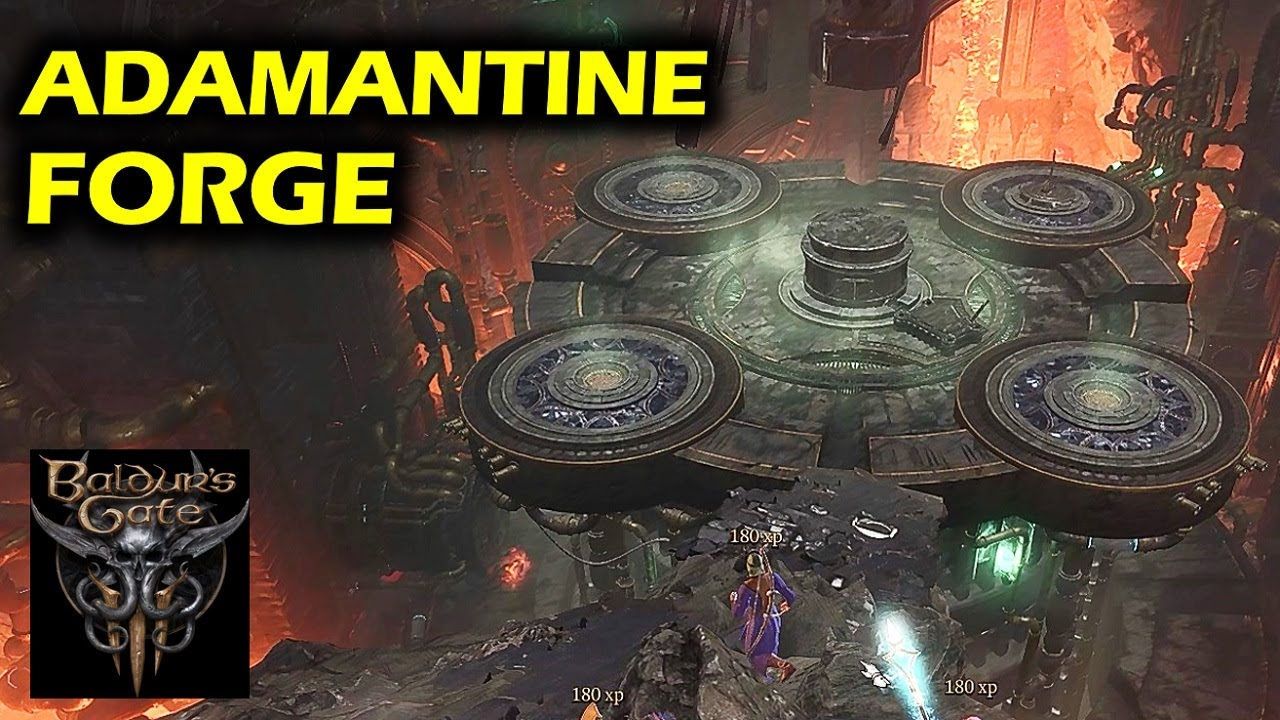
The Adamantine Forge is a remnant of a bygone era, a powerful dwarven creation capable of forging adamantine, an incredibly strong and lightweight alloy. Finding this forge becomes an important objective in Act One, as the crafted items it offers can significantly boost your party’s capabilities.
Here’s what you need to know about the Adamantine Forge:
Location: The forge is hidden deep within the Underdark, an extensive network of subterranean tunnels accessible through the Underdark Beach waypoint. Be prepared to face dangers like duergars and other hostile creatures on your journey.
Activation: Once you locate the forge, it appears dormant. To activate it, you’ll need to gather specific materials and interact with levers and buttons found around the platform.
The Magic of Mithril and Molds: Fueling the Forge
The Adamantine Forge utilizes a unique crafting system that differs from traditional weapon and armor acquisition methods in BG3. Here’s how it works:
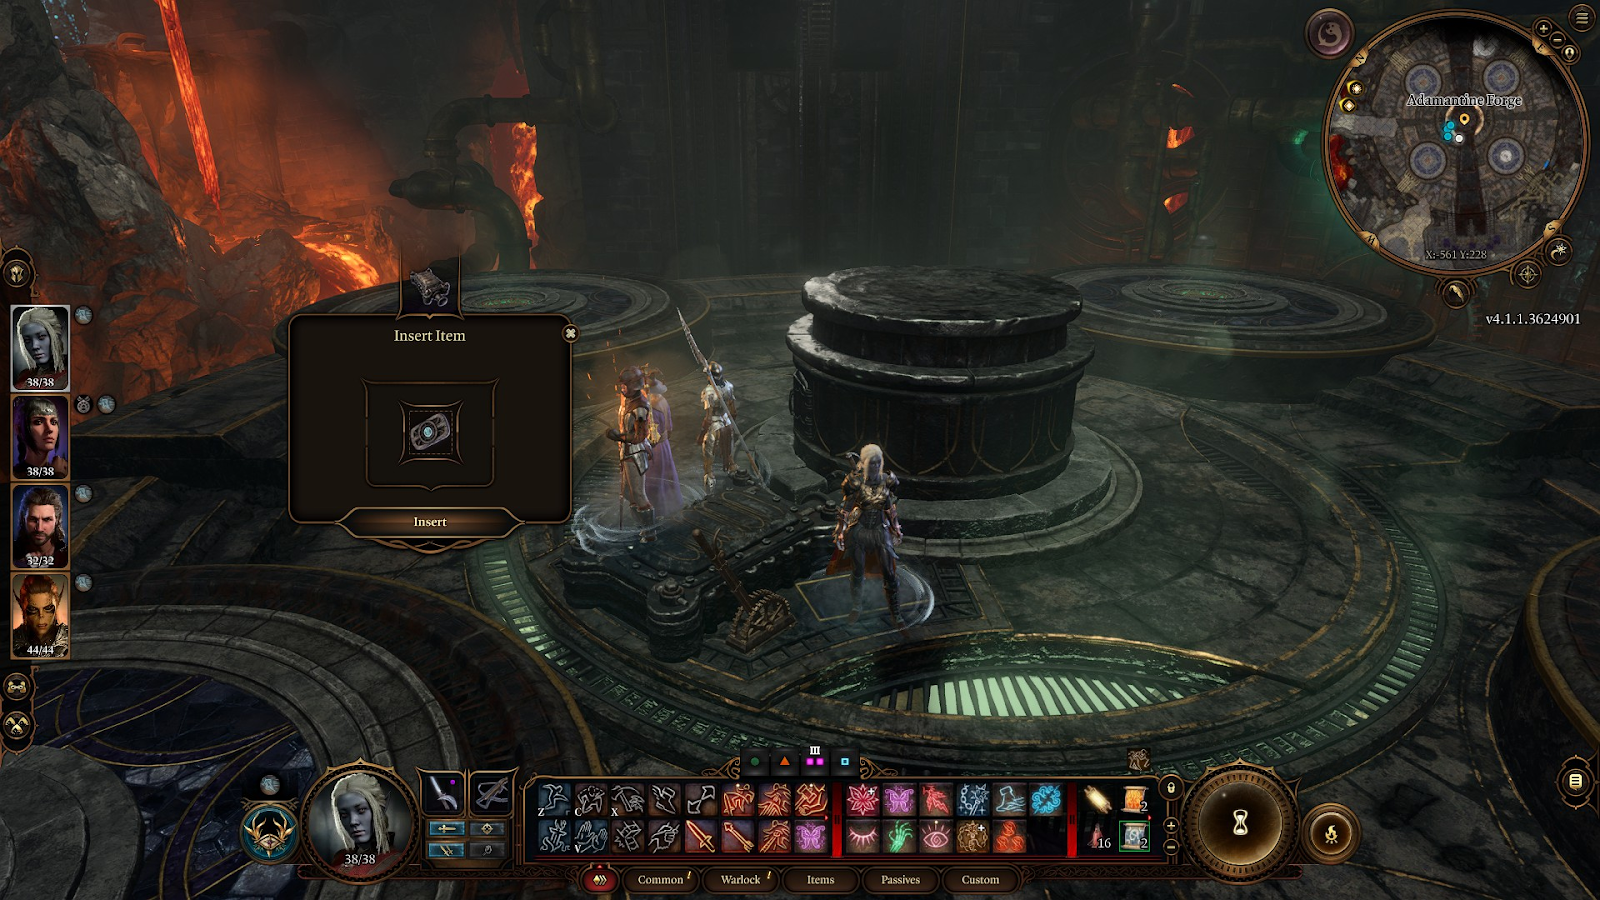
Mithril Ore: This precious metal serves as a key ingredient in the forging process. Mithril veins can be found scattered throughout the Underdark. Look for glowing blue clusters on cave walls and destroy them to collect the ore.
Molds: These special items determine the type of equipment you can craft. Different molds exist for various weapons and armor pieces. You’ll find molds through exploration or by purchasing them from certain vendors.
The Forging Process: Once you have mithril ore and a desired mold, approach the forge. Place the mold in the chamber and the mithril ore in the crucible. Activate the forge lever to lower the platform and initiate the crafting process.
Important Note: The Adamantine Forge consumes mithril ore during each crafting session. Use your mithril wisely and plan your creations carefully.
From Crucible to Champion: Crafting Powerful Equipment
The Adamantine Forge allows you to forge exceptional equipment that outclasses most standard gear found during early exploration in BG3. Here’s what you can expect:
Enhanced Stats: Weapons crafted at the Adamantine Forge boast superior damage output and critical hit chances. Armor offers increased protection against physical and magical attacks.
Unique Properties: Certain molds might grant crafted items special properties, such as elemental damage or resistance to specific effects. Experiment with different molds to discover the perfect equipment for your party’s needs.
By harnessing the power of the Adamantine Forge, you can significantly improve your party’s combat effectiveness, giving you an advantage over enemies you encounter throughout your Baldur’s Gate 3 adventure.

Beyond the Basics: Tips and Tricks for Mastering the Forge
As you delve deeper into the secrets of the Adamantine Forge, here are some tips and tricks to maximize its potential:
Prioritize Weapon Crafting: In the early stages of BG3, focusing on crafting powerful weapons for your damage dealers can yield greater combat benefits compared to armor.
Plan Your Mithril Usage: Mithril ore can be scarce in the Underdark. Carefully consider which equipment to craft first based on your party’s needs. Forging weapons for multiple party members might be more advantageous than crafting heavy armor for just one character.
Explore Thoroughly: Keep an eye out for hidden caches and containers throughout the Underdark. These may contain mithril ore or even valuable molds.
Seek Out Merchants: Some vendors in the surface world, particularly those specializing in rare materials, might sell mithril ore or unique molds. Check their wares frequently.
Consider Party Composition: Think about your party’s class makeup when deciding what to craft. If you have a rogue, prioritize crafting light and agile daggers or shortbows. For heavy fighters, consider two-handed axes or plate armor.
Utilize Your Environment: The Underdark is fraught with peril. Use the environment to your advantage. For example, lure enemies near deep chasms or explosive barrels to thin their numbers before engaging in combat, especially when protecting your mithril supplies.
By following these tips and experimenting with different crafting combinations, you can transform the Adamantine Forge from a simple crafting station into a wellspring of powerful equipment, empowering your party to conquer the challenges that lie ahead in Baldur’s Gate 3.
Remember, information about BG3 is still being updated as the game is in Early Access. New discoveries regarding the Adamantine Forge may be made in the future. Keep an eye out for community guides and discussions to stay abreast of the latest findings. With strategic planning and resourcefulness, you can harness the power of the Adamantine Forge to forge your path to victory in Baldur’s Gate 3.

FAQs
The Adamantine Forge in Baldur’s Gate 3 is a hidden gem offering powerful crafting opportunities. Here’s a breakdown to quench your thirst for knowledge:
What is the Adamantine Forge?
Deep within the Underdark lies the Adamantine Forge, a legendary furnace capable of crafting incredibly powerful weapons and armor. By harnessing its might, you can significantly enhance your party’s gear.
How do I find the Adamantine Forge?
Reaching the Forge requires some exploration:
Reach the Underdark: Traverse the Underdark using the Underdark Duergar Boat located at the Underdark Beach waypoint.
Seek the Abandoned Refuge: Navigate through the Underdark until you find the Abandoned Refuge area.
Bridge the Gap: Use the hanging bridges and levers (or ranged attacks) to cross above lava pits.
How do I use the Adamantine Forge?
The Forge requires specific ingredients and actions:
Gather the Supplies:
Mold: Find a weapon or armor mold (acquired through quests or exploration).
Mithral Ore: Locate Mithral Ore veins in the Underdark (watch out for fiery Imps!).
Activate the Forge:
Place the mold in the chamber.
Add Mithral Ore to the central crucible.
Pull the Forge Lever to lower the platform and access the lower level.
Craft Your Gear:
Interact with the crucible again to add more Mithral Ore (used per crafting session).
Pull the Forge Lever to activate the hammer and initiate the crafting process.
What are some helpful tips?
Explore the Underdark thoroughly to find weapon/armor molds and Mithral Ore.
Save your game before using the Forge, as the crafting process consumes Mithral Ore.
Consider character abilities: If someone in your party has teleportation or ranged attacks, they can help navigate the hanging bridges.
Where can I find more information?
IGN Walkthrough: https://www.ign.com/wikis/baldurs-gate-3/The_Adamantine_Forge
Fextralife Wiki: https://bg3.wiki/wiki/Adamantine_Forge
YouTube Guide: Search for “Baldur’s Gate 3 Adamantine Forge Guide” for video tutorials.
Remember: The Adamantine Forge offers a chance to create legendary equipment. So, gather your supplies, delve into the Underdark, and unleash the power of this ancient relic!
To read more, Click Here.